The purchasing process for LCD displays can be quite complex. And as a procurement manager, you’re ultimately accountable for ensuring your end users receive the displays they need, when and where they need them.
But what does an effective procurement process look like? Is there a specific order of actions to take? What needs to be considered at each stage?
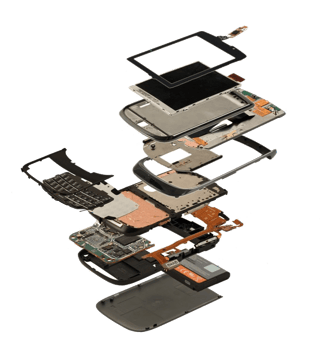
Below are the phases to go through to ensure successful delivery of the right LCD displays to your team, from needs the identification stage to production.

Phase 1: Identifying a Need
The first step in purchasing any products, especially LCD displays, is identifying what is driving this requirement. For LCD displays, this will likely originate from engineering or operations and be linked to one or more of these common display problems:
- New design — There is a new product design which requires a new LCD display.
- Delivery — You’re experiencing either long lead times, or not receiving LCD displays per the supplier's commitment.
- Quality — You manufacturing defect rate or field return rate is high.
- Performance — The current LCD displays is underperforming for what is technically possible.
- Obsolescence — The current LCD display has been discontinued.
- Cost — You’re paying at or above the market price for your LCD displays.
Before moving forward, ensure you fully understand what problem(s) you’re trying to solve with your purchase. This is especially true if you need a new design, where assessing user needs and determining the type of display you need are essential.
Phase 2: Searching the Market for a Supplier
The next phase involves finding an LCD display supplier. And not just any supplier—the right supplier. You’ll need to search for a supplier that
- is in a similar volume market to you;
- has worked with your type of technology before; and
- is able to do semi-custom or custom to match your specific display needs.
And once you’ve identified potential candidates for fulfilling your LCD display orders, you’ll need to get quotes and go through the appropriate LCD display supplier vetting process. This way, you ensure the new supplier is the best fit for your organization.
Phase 3: Design
The design phase is where end user and product needs become technical specifications. Essentially, there are two paths to take in this phase. One which stems from resolving the display problems mentioned previously, the second being the development of a new design to optimize the end products’ value.
For the new design path, you’ll need to work with engineering to determine the type of technology and functionality that’s needed. That means considering key factors such as:
- Environment (e.g., inside vs. outside)
- Monochrome or Color
- Display size
- Drop testing
- Touch capabilities
- Specific user needs
To help you determine the type of display you need, we’ve detailed what you need to consider in a previous post. We’ve also compiled a list of eight common display integration design mistakes you should avoid.
For the path concerning any of the other common problems (e.g., obsolescence), you’ll need to gather all relevant background details involving the display problem(s) that prompted the need to purchase new LCD displays.
Next, the two paths converge when the LCD design team takes the information you’ve developed or gathered and turns it into a detailed specification for review. Feedback should be provided from the review, enabling an iterative loop that results in the creation of the optimal design.
Phase 4: Tooling
Once you have an approved design, it’s on to the tooling phase. This is where you want to get details on cost-related activities and accountabilities. Here’s several questions to help guide you:
- Will the supplier pay for the tooling, or is it a separate cost? Can it be amortized in the production unit price?
- What requirements are needed to complete the tooling phase?
- Are there charges for minor changes to the design during this phase?
After you and your supplier have agreed on terms, the tooling phase typically takes 4–8 weeks depending on the complexity and nature of any changes. Once completed, you’ll have a completed prototype LCD display.
Phase 5: Prototype
With tooling completed, up next is producing prototypes, the first samples of your LCD displays. This phase is important because you’re able to uncover several areas of improvement:
- Fit or functional integration issues between the assembly and the LCD display
- Design-related issues concerning the assembly or display
- Possible manufacturing or tooling issues uncovered with the displays
- Possible design change advantages not discovered during the initial design phase
Similar to the design phase, it’s common to have several iterations where some of the features are redesigned as a result of the first prototype phase. To note, depending on the severity of changes, there may be additional tooling cost implications stemming from these iterations.
Phase 6: Pilot (Optional)
With a few prototypes produced and finalized, the pilot phase comes next. This is considered a pre production phase focused on manufacturing a lower volume of displays to support the ramp-up of the end product for the customer. This phase is more relevant for a new product design, and often skipped when replacing a display in an ongoing project.
Phase 7: Production
The final phase is production. There are a number of aspects to consider at this point: Delivery options, QA inspection, line down contingencies, and the RMA process. For delivery options, you need to consider how purchase orders and deliveries are structured:
- Is production performed all at once?
- Do deliveries happen over time? If so, at what frequency/schedule?
- What are the shipping terms?
- What are the payment terms?
For QA inspection, typically, LCD displays are inspected three times with the final test for several quality indicators:
- Cosmetic defects
- Full functionality, including backlight, touch panel, and pixel fill
- Specific performance attributes, such as backlight brightness, color, contrast
- Critical mechanical attributes
Avoiding a line down situation is critical component in a successful production program. To do so, you must have contingencies in place, such as safety stock and options for expediting. We’ve explored this topic in more detail in a previous post on contingencies in an LCD display supply chain.
For the RMA process, ensure the terms are spelled out clearly so both parties know their responsibilities. Be sure to know exactly how returns are handled, including whether they will be credited and whether a failure analysis and corrective action are required.
From Complex to Manageable
While the purchasing process may seem complex initially, knowing the exact steps you need to take can make the process much more manageable. From starting with a need to producing an LCD display that addresses that need, following the purchasing process we’ve laid out will ensure you are making the right purchasing decision.
Need a new supplier that understands your unique display needs and can produce custom displays that address them? Let us help. Contact us.